Building Your Own NAS: Configuring Services
08 Mar 2026 [Blog SysAdmin Linux NAS 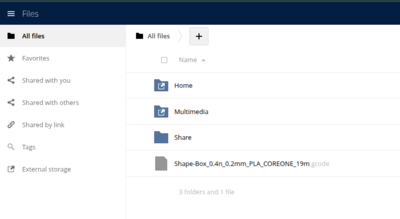
When discussing NAS solutions, most people think of “a box with disks that shares files.” In practice, a modern NAS is much more than that. This part covers configuring all key services: Samba, ownCloud, Nginx, and WireGuard VPN.
This is part 3 of the “Building Your Own NAS” series, originally published on root.cz. S1: Hardware & OS · S2: Custom Case & Data Migration · S3: Service Configuration · S4: Monitoring · S5: Security & Firewall
Core Requirements
My requirements for a functional NAS:
- Samba — file sharing for Windows and Linux within the home network
- Web UI — browser-based access from anywhere
- Mobile application — phone access from both local network and internet
- Nginx — reverse proxy for containerized applications and TLS termination
- WireGuard VPN — secure remote connection to the home network
Samba and File Sharing
Installation
apt install samba
Core Configuration
The main configuration file is /etc/samba/smb.conf. Key global settings include:
- Workgroup identification
- Server role:
standalone server - Security mode:
user(user-based authentication) - Network interface binding
- Logging parameters
- File creation permissions
- Printer support disabled
This uses Samba 4.19.5, where older protocols like SMBv1 are disabled by default — a security improvement.
Shared Folders
Three primary share types:
1. Home directories — password-protected, restricted to the sambausers group:
[homes]
   comment = Home Directories
   browseable = no
   read only = no
   create mask = 0700
   directory mask = 0700
   valid users = %S
2. Multimedia — public media sharing with guest access:
[multimedia]
   comment = Multimedia
   path = /nas/multimedia
   guest ok = yes
   read only = yes
   browseable = yes
3. Backup — non-browseable backup storage:
[backup]
   comment = Backup
   path = /nas/backup
   browseable = no
   valid users = @sambausers
Service Discovery (Autodiscovery)
Optional but convenient:
- Linux networks: Install
avahi-daemonfor mDNS/Bonjour discovery - Windows 10+ networks: Install
wsddfor Windows Service Discovery
Application Deployment Strategy
Docker containerization is used with a simple principle: each application has its own directory containing docker-compose.yml, managed by a universal systemd service template.
Systemd Service Template
Create /etc/systemd/system/dc@.service:
[Unit]
Description=Docker Compose service: %i
After=docker.service network-online.target
Requires=docker.service

[Service]
Type=oneshot
RemainAfterExit=yes
WorkingDirectory=/containers/%i
ExecStart=/usr/bin/docker compose up -d --remove-orphans
ExecStop=/usr/bin/docker compose down

[Install]
WantedBy=multi-user.target
This template enables consistent deployment of complex multi-container applications without requiring Kubernetes or similar orchestration. To deploy any application:
systemctl enable dc@owncloud.service
systemctl start dc@owncloud.service
Web UI and Mobile App: ownCloud
Why ownCloud
ownCloud was selected over Nextcloud — appropriately featured without unnecessary complexity. It provides essential functionality for data access and sharing while maintaining simplicity.
Directory Structure
/containers/owncloud/
├── docker-compose.yml
└── .env

/var/lib/containers-data/owncloud/
├── server/
├── db/
└── dbbackup/
docker-compose.yml
The docker-compose.yml defines three services:
- ownCloud server — the main application
- MariaDB — database backend
- Redis — caching layer
Each has appropriate volume bindings, environment variables sourced from .env, and health checks.
The .env file stores sensitive credentials:
OC_VERSION=10.15
DOMAIN=nas.example.com
ADMIN_PASSWORD=changeme
DB_PASSWORD=changeme
HTTP_PORT=8080
Access Rights Management
The External Storage feature in ownCloud is used to mount directories from Samba shares into user spaces. This approach has several advantages:
- ownCloud accesses data through Samba rather than direct filesystem access
- Unified audit logging through Samba for all access methods
- Cross-user directory sharing is straightforward
Administrators enable External Storage in ownCloud admin panel:

Users then connect their own Samba share in personal settings:

The resulting user file view:

Database Backup
# Binary backup using mariadb-backup
docker exec owncloud-mariadb mariadb-backup \
    --backup --target-dir=/backup/$(date +%F)

# SQL dump
docker exec owncloud-mariadb mariadb-dump \
    --all-databases > /backup/dump-$(date +%F).sql
Backups are stored in /backup/ (mapped to /var/lib/containers-data/owncloud/dbbackup), with Restic handling broader backup of the entire containers data directory.
Nginx as Reverse Proxy and TLS Terminator
Containerized applications run on port 8080. Nginx serves as the main reverse proxy and TLS terminator — individual applications don’t need to manage certificates.
Installation
apt install nginx
Port Configuration
Due to router limitations, port 8443 is used instead of standard 443. Router port forwarding:
- Port
80→ NAS:80 (required for Certbot’s http-01 challenge) - Port
8443→ NAS:443
Let’s Encrypt Certificate
Prerequisites before acquiring a certificate:
- Static IP: Create a type A DNS record pointing to your IP
- Dynamic IP: Use DDNS with a CNAME record (my approach)
- No public IP: Internet access becomes impossible without external tunneling
Install Certbot following the official documentation.
Create a virtual host, then run:
certbot --nginx -m your@email
Certbot automatically detects configuration, updates Nginx, and sets up automatic certificate renewal via cron or systemd.timer.
Proxy Configuration
A location block proxies requests to the ownCloud container with appropriate header forwarding:
server {
    listen 443 ssl;
    server_name nas.example.com;

    location / {
        proxy_pass http://localhost:8080;
        proxy_set_header Host $host;
        proxy_set_header X-Real-IP $remote_addr;
        proxy_set_header X-Forwarded-For $proxy_add_x_forwarded_for;
        proxy_set_header X-Forwarded-Proto https;
        proxy_set_header X-Forwarded-Port 8443;
    }
}
The X-Forwarded-Proto and X-Forwarded-Port headers ensure ownCloud recognizes the correct external interface.
VPN: WireGuard
WireGuard was selected for its straightforward, uncomplicated implementation.
Key Generation
wg genkey | tee wg-private | wg pubkey > wg-public
chmod 0600 wg-private
Server Configuration
/etc/wireguard/wg0.conf:
[Interface]
Address = 10.1.0.1/24
ListenPort = 51820
PrivateKey = <server-private-key>

# Allow VPN clients to reach the internal LAN and route traffic through NAS
PostUp = iptables -A FORWARD -i wg0 -j ACCEPT; \
         iptables -A FORWARD -o wg0 -j ACCEPT; \
         iptables -t nat -A POSTROUTING -o enp1s0 -j MASQUERADE
PostDown = iptables -D FORWARD -i wg0 -j ACCEPT; \
           iptables -D FORWARD -o wg0 -j ACCEPT; \
           iptables -t nat -D POSTROUTING -o enp1s0 -j MASQUERADE

[Peer]
# Client 1 — Phone
PublicKey = <client1-public-key>
AllowedIPs = 10.1.0.2/32

[Peer]
# Client 2 — Laptop
PublicKey = <client2-public-key>
AllowedIPs = 10.1.0.3/32
Replace interface names (enp1s0) to match your specific network configuration.
Status Monitoring
wg
Displays connection status including peer endpoints, allowed IPs, handshake timestamps, and traffic statistics.
Enable and start:
systemctl enable wg-quick@wg0
systemctl start wg-quick@wg0
Sources
- Repository with all configs: github.com/rvojcik/nas-diy-resources
- Samba documentation
- Docker Compose documentation
- WireGuard VPN
Next: Monitoring
In the next chapter, we’ll set up comprehensive monitoring with Telegraf, InfluxDB, Grafana, and email notifications.