Building Your Own NAS: Custom Enclosure and Data Migration
07 Mar 2026 [Blog SysAdmin Linux NAS 
In this second part of the series, we tackle two major challenges: designing and 3D-printing a custom NAS enclosure, and migrating data from the original QNAP RAID to the new ZFS-based storage.
This is part 2 of the “Building Your Own NAS” series, originally published on root.cz. S1: Hardware & OS · S2: Custom Case & Data Migration · S3: Service Configuration · S4: Monitoring · S5: Security & Firewall
Custom Enclosure Design and 3D Printing
I chose a standard Mini-ITX motherboard and decided on a DIY approach using 3D printing, though commercial solutions exist. For high-performance systems with demanding cooling requirements, traditional metal enclosures are recommended.
Choosing Modeling Software
Software selection depends on personal preference — try multiple options:
- OnShape — Cloud-based, no installation required
- SketchUp — Simple and intuitive
- FreeCAD — Open-source but less suitable for parametric mechanical design
- Blender — Versatile but requires patience for technical modeling
- Fusion 360 — Powerful tool with a free hobby license for non-commercial use
I ultimately chose Fusion 360 for its intuitive interface and compatibility with technical thinking.
Important: The hobby license prohibits commercial use and limits annual income to $1,000.
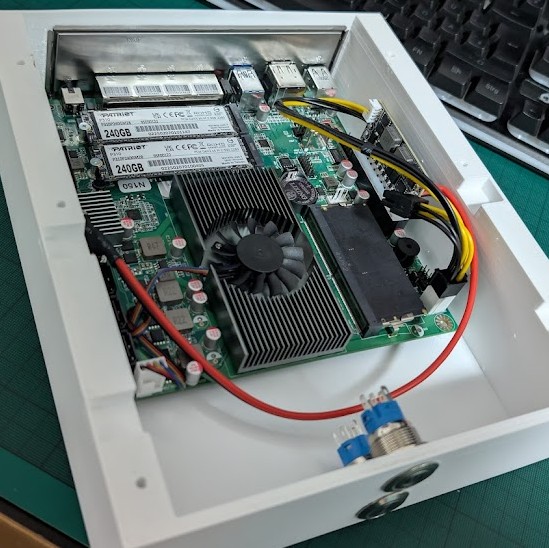
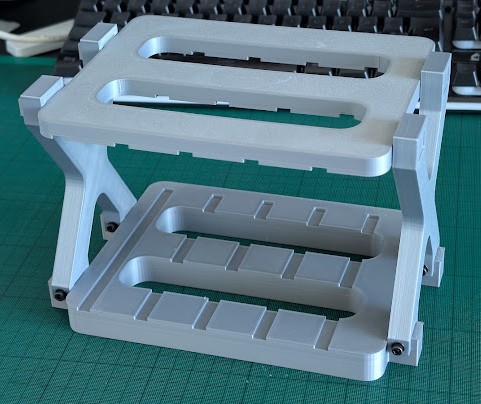
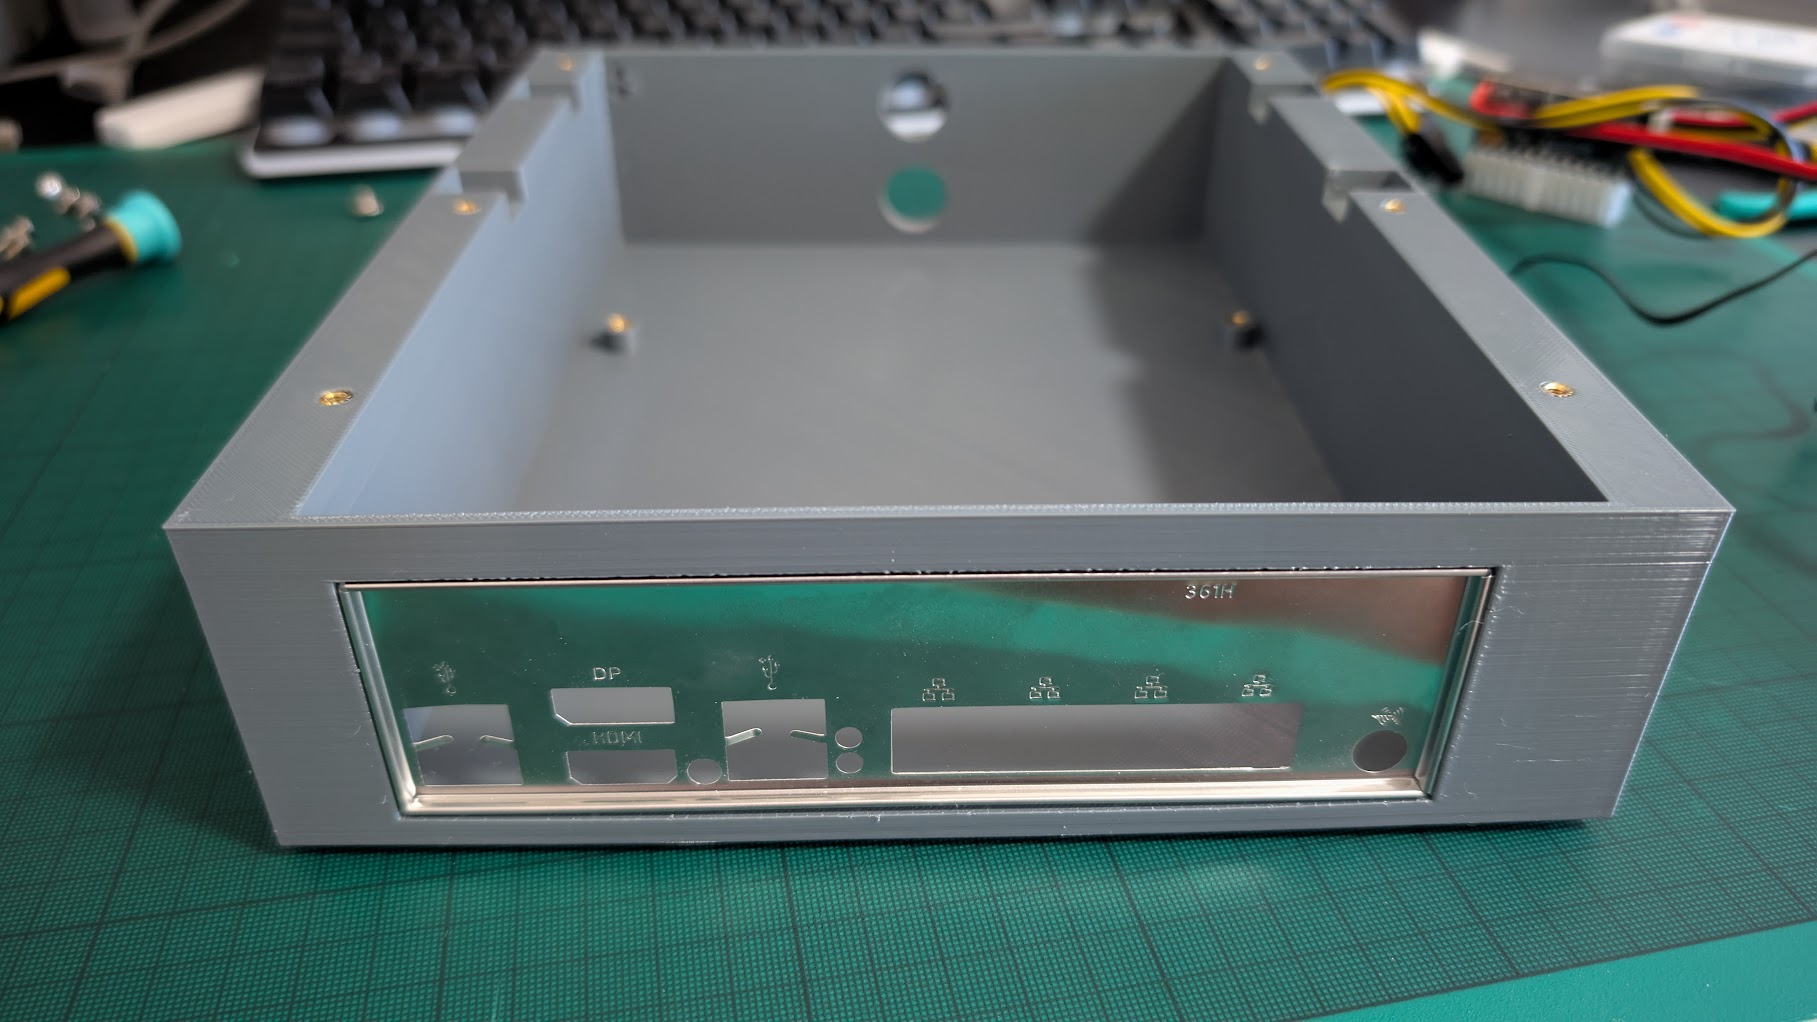
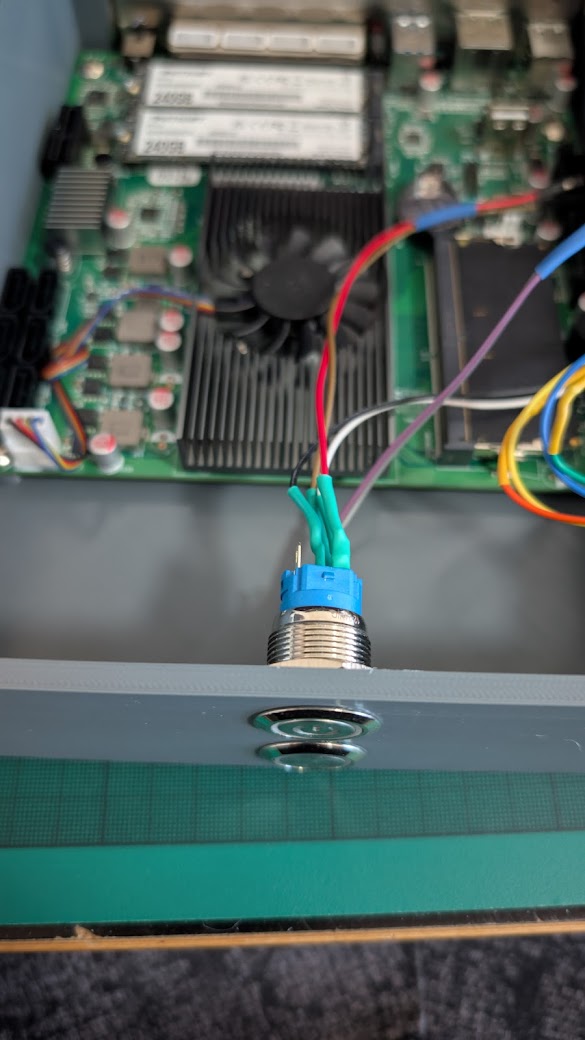
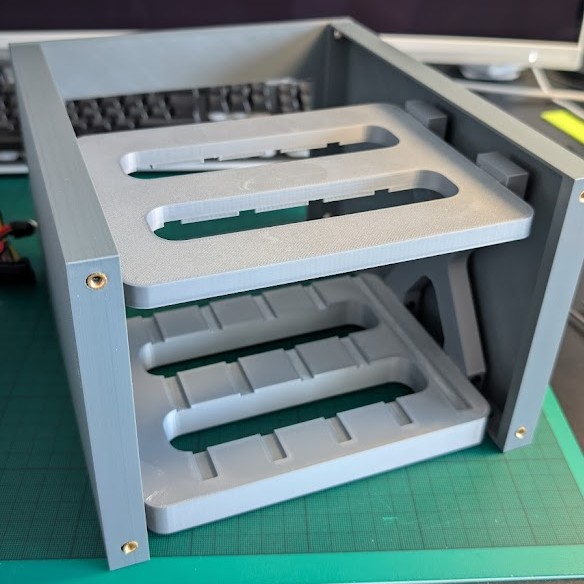
First Prototype
Before printing the final enclosure, I created a test prototype to verify hardware functionality and identify design issues. Key measurements recorded:
| Scenario | Power consumption |
|---|---|
| Idle (base) | Up to 18 W |
| During backups | Up to 50 W |
| Full load testing | Up to 85 W |
The external 90 W power supply proved stable throughout a ~4-hour stress test, maintaining consistent temperatures. Temperature management was a primary concern for the 3D-printed design.
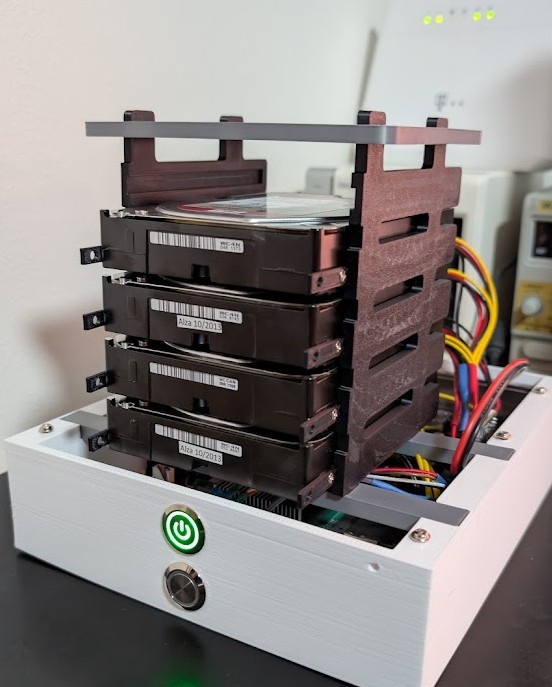 (First prototype — primarily for hardware testing and data migration)
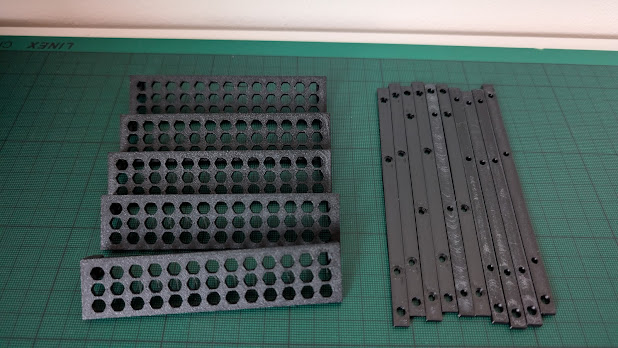
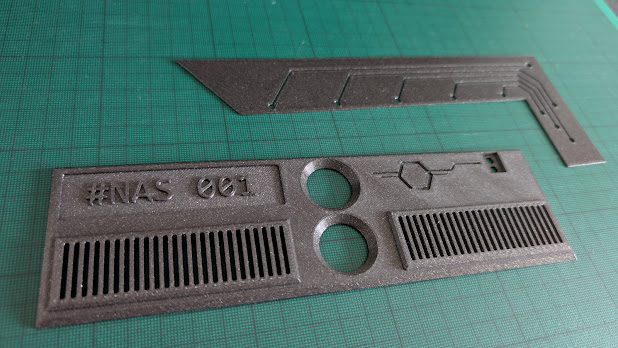
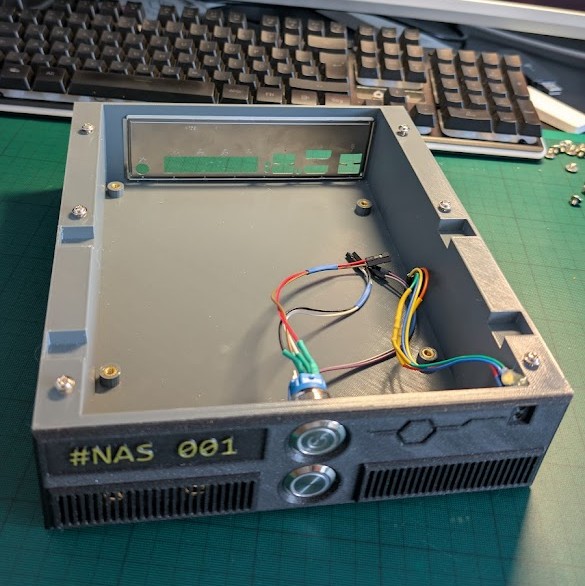
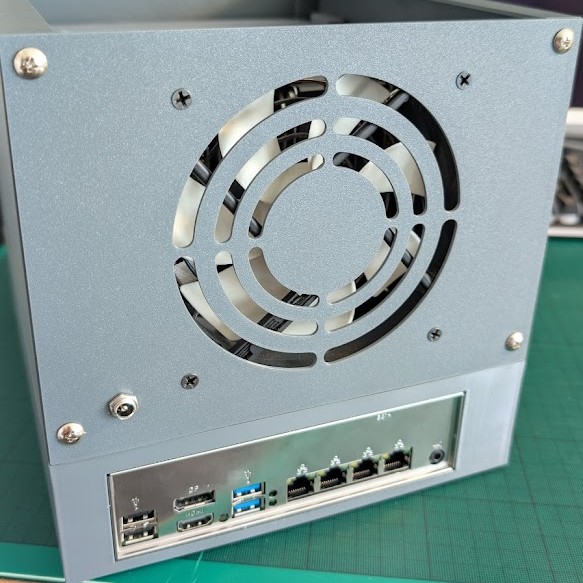
3D Printing Materials
Different materials were selected for different components:
| Material | Used for |
|---|---|
| ASA | Disk-holding parts and rail components (heat-resistant) |
| PETG | Most structural parts |
| PLA | Decorative covers and front panel |
Kapton tape was applied under the base board as thermal protection — capable of withstanding 260°C continuously and 400°C briefly.
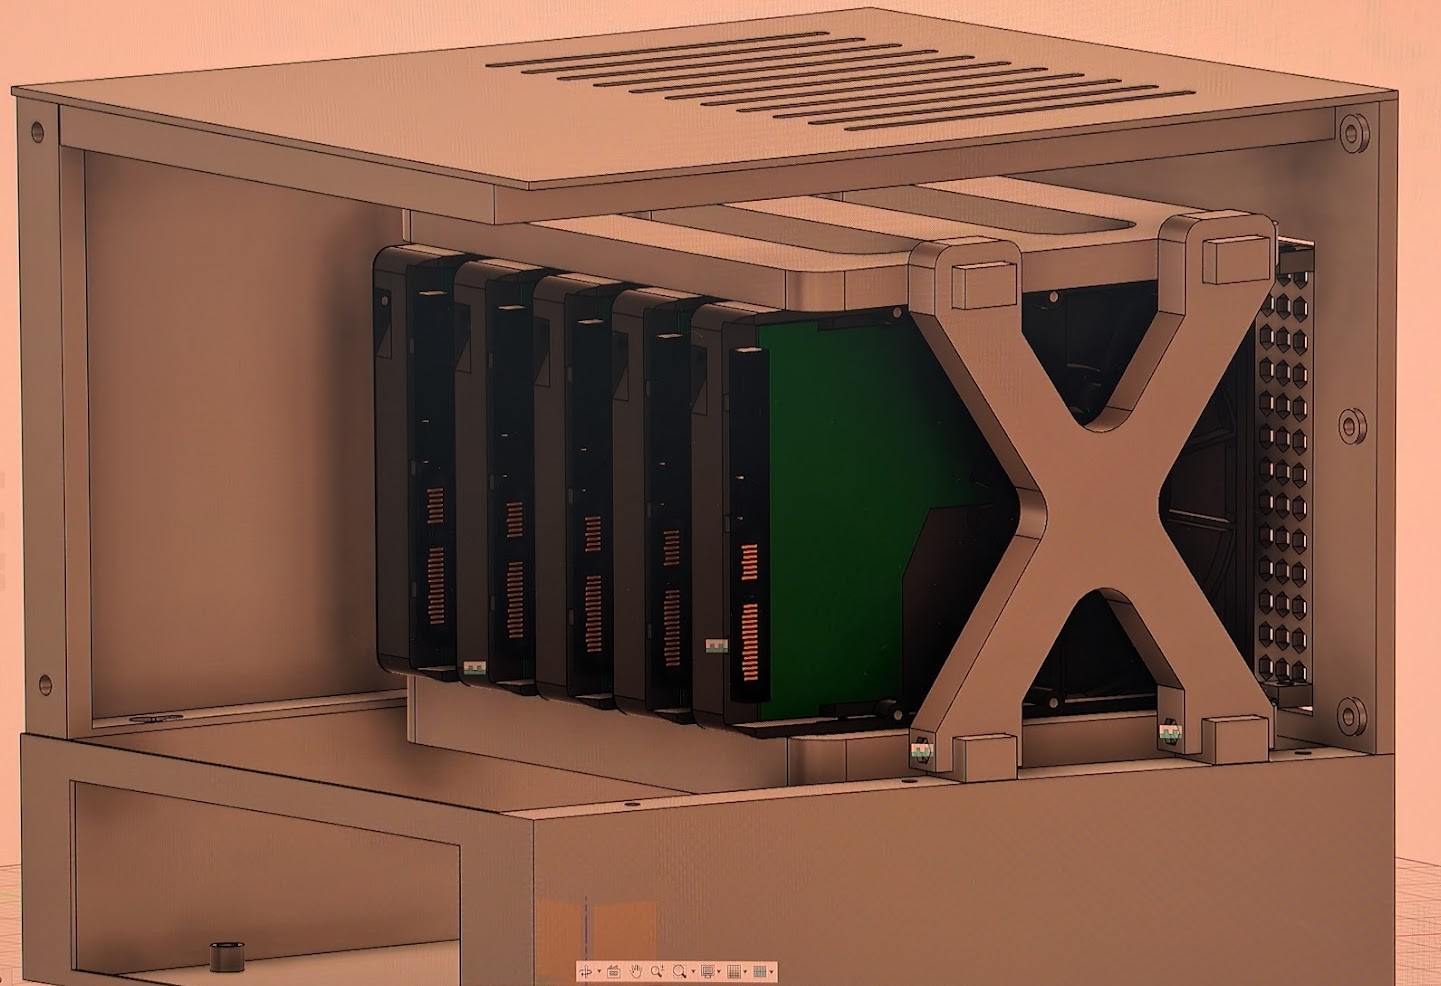
The final enclosed design achieved approximately 10–15°C lower temperatures compared to the original QNAP solution, maintaining around 40°C under load and 35°C during normal operation. The complete 3D model is available on Printables.com.
Design evolution — from the bare “naked” frame, through a clean functional structure, to the final tuned version:
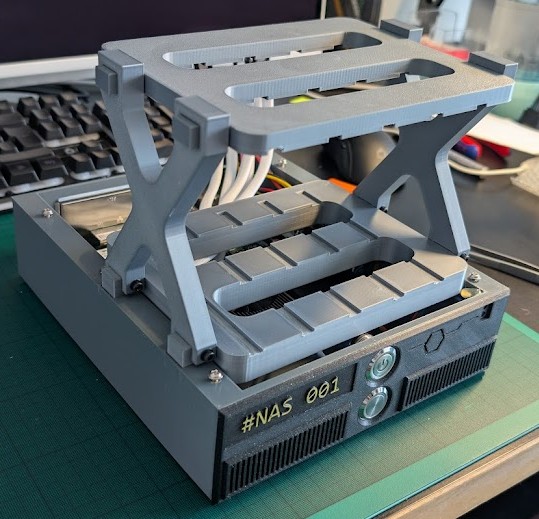
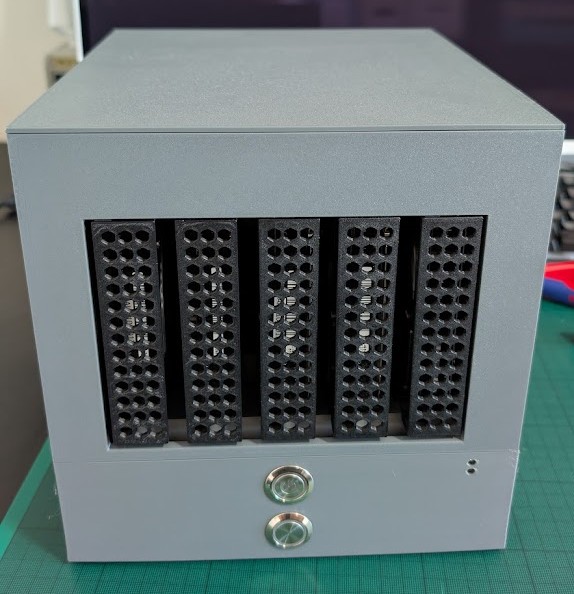
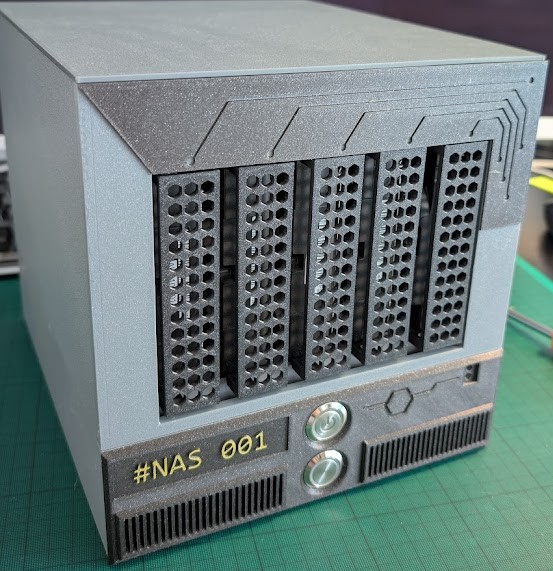
Build Gallery


Storage Preparation and Data Migration
Detecting the Original RAID
The original QNAP system used Linux software RAID (MD-RAID). Ubuntu Server automatically detected and assembled the original array without any issues:
cat /proc/mdstat
Manual Array Assembly
If automatic assembly fails, use these commands step by step:
# 1. Check current RAID devices
cat /proc/mdstat

# 2. Attempt manual assembly
mdadm --assemble --scan

# 3. Scan for LVM devices
pvscan
vgscan

# 4. Display volume groups
vgdisplay

# 5. Activate all LVM partitions
vgchange -a y

# 6. List logical volumes
lvscan
The original QNAP volume group was named vg1 containing DataVol1 (7.27 TiB). Mount it:
mkdir -p /mnt/qnap-data
mount /dev/vg1/DataVol1 /mnt/qnap-data
Data Transfer to New Storage
A new ZFS pool was created for the archive:
# Install ZFS utilities
apt install zfsutils-linux

# Create ZFS pool with 4K block alignment
zpool create -o ashift=12 backup /dev/sde

# Create dataset with LZ4 compression
zfs create -o compression=lz4 backup/olddata
Data transfer achieved approximately 280 MB/s:
rsync -av --numeric-ids --progress --stats /mnt/qnap-data/ /backup/olddata/
Key rsync options:
-av— Archive mode with verbosity--numeric-ids— Preserve UID/GID numerically without name mapping--progress --stats— Display transfer progress and final statistics
The complete transfer took 6–7 hours with disk temperatures around 38°C.
Cleaning the Old Array
After confirming the backup, carefully remove the original RAID configuration:
# Unmount original data
umount /mnt/qnap-data

# Deactivate volume group
vgchange -a n vg1

# Remove volume group
vgremove /dev/vg1

# Remove physical volume from RAID
pvremove /dev/mdXYZ

# Stop the specific array
mdadm --stop /dev/mdXYZ

# Or stop all arrays at once
mdadm --stop --scan

# Clear superblocks on all disks — proceed with caution!
mdadm --zero-superblock /dev/sdX
Creating the New ZFS Pool
With the disks cleared, create the production ZFS pool:
# Create pool with single-disk parity (similar to RAID 5)
zpool create -o ashift=12 nas raidz1 /dev/sda /dev/sdb /dev/sdc /dev/sdd

# Create datasets with appropriate record sizes
zfs create -o compression=lz4 -o recordsize=1M nas/multimedia
zfs create -o compression=lz4 -o recordsize=128k nas/data

# Create encrypted dataset for user home directories
zfs create -o compression=lz4 -o recordsize=128k \
    -o encryption=on -o keyformat=passphrase nas/homes
Notable parameters:
ashift=12— 4K block alignment for modern drives- Larger
recordsizefor multimedia files improves sequential performance - Encryption applied to home directories only, keeping media accessible while protecting personal data
Next: Service Configuration
In the next chapter, we’ll configure Samba, ownCloud, Nginx reverse proxy, and WireGuard VPN to make the NAS accessible from anywhere.